

How to Make Raw Milk Kefir (And Why You Should!)
Raw milk kefir is a personal favorite of mine. It is rich, tangy, versatile, and full of health benefits.

This post may contain affiliate links. Please see our site disclosure for more information.


Skip the store-bought! Making your own milk kefir is a super simple way to begin incorporating fermented drinks into your diet. The process requires only two ingredients, minimal kitchenware, and it is mainly hands-off, which means it is hard at work following the natural fermentation process, without you ever having to worry about it.
Interested in making your own homemade milk kefir? Follow along and I’ll take you through why you should begin including this in your diet, how to get started, and the easiest maintenance routine to ensure you always have some on hand (without any stress).
Also, don’t forget to check out the cost-benefit analysis so you can see how you can save money by making milk kefir in your own kitchen.
First Things First: What is Milk Kefir? And Why Should I Make It?
I first learned of milk kefir, and the benefits of raw milk, through Nourishing Traditions by Sally Fallon. My husband grew up taking care of dairy cows with his dad, so he was very familiar with raw milk, and preferred it over store-bought pasteurized homogenized milk. For me, it was a strange idea at first. It was something new and something I was cautioned against. However, after learning of the benefits, I decided to give it a try as a way to improve the quality of what we consume in our diet.
We are fortunate to live in an area with several Old Order Mennonite communities. They are a great resource for locally grown fruits and vegetables, homemade baked goods, homemade personal care and cleaning products, pasture-raised eggs, and raw milk. After signing up for a weekly herd share, we began consuming raw milk exclusively.
To learn more about what a herd share is, please see here:
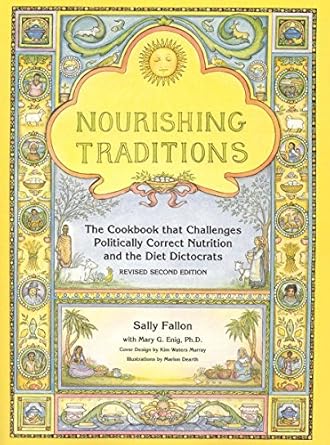
Nourishing Traditions by Sally Fallon
Nourishing Traditions by Sally Fallon is arguably one of the best places to start when venturing into changing your diet from modern and conventional to whole-food based and traditional. Between the nutritional information and the wide variety of recipes, you will be prepared to turn over a new leaf.
Benefits of Raw Milk:
- contains lactic-acid-producing bacteria which protect against pathogens
- whole complex of proteins more available
- retains the natural vitamin and mineral content
- no loss of enzymes, which means better assimilation, digestion, and utilization
- no added chemicals or synthetic vitamins
To read more about raw milk safety, benefits, and sourcing, please see this blog post:
What is Milk Kefir?

Milk kefir is a cultured dairy product. When you “feed” your milk with kefir grains, the milk undergoes a lacto-fermentation process, which allows the naturally occurring friendly bacteria to break down lactose (milk sugar) and predigest casein (milk protein). This process often allows the end product to be well tolerated. Once the friendly bacteria have produced enough lactic acid to inactivate the bad bacteria, the milk is now preserved for several weeks.
Benefits of Raw Milk Kefir:
- abundant source of gut-healthy probiotics (beneficial yeast and bacteria in a symbiotic relationship)
- increased lactase, the enzyme needed to break down lactose (milk sugar), making the milk more tolerable for people who are sensitive to dairy
- more numerous enzymes, which help to absorb calcium and other minerals
- beneficial bacteria and lactic acid in the digestive tract keep pathogens at bay, guard against infectious illness, and aid in fuller digestion of all food consumed
- enjoyable and tasty on it’s own, and can also be used in smoothies, baked goods, and homemade dressings
(source)
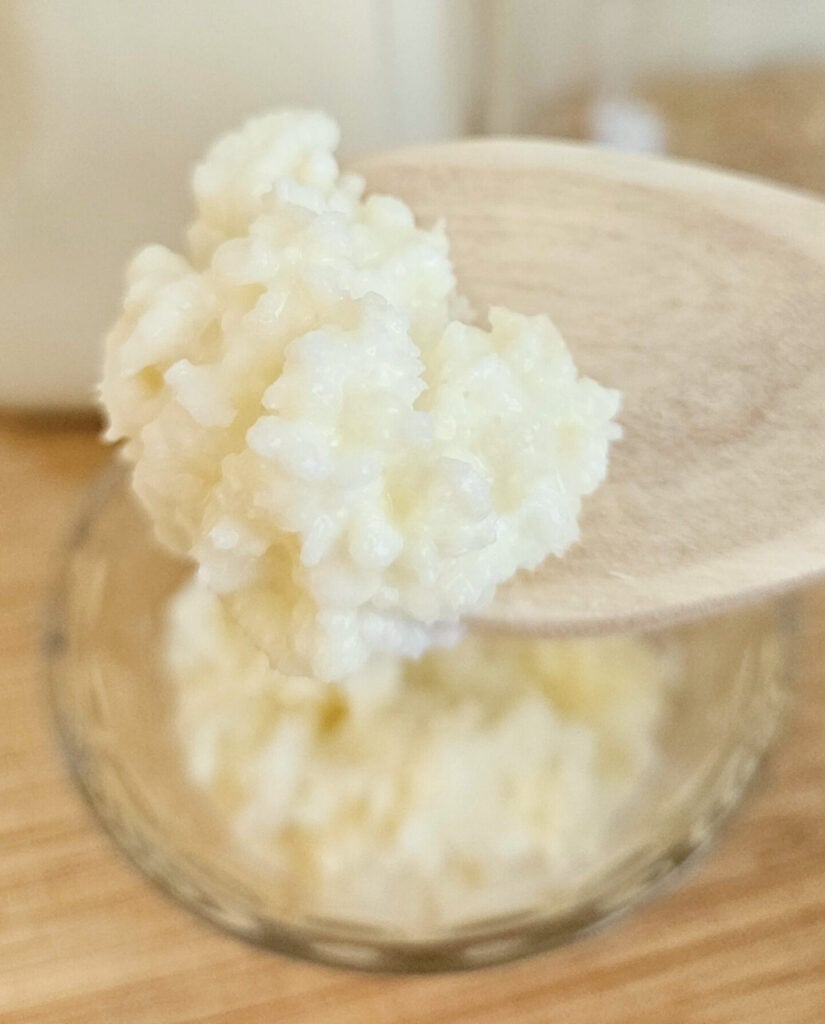
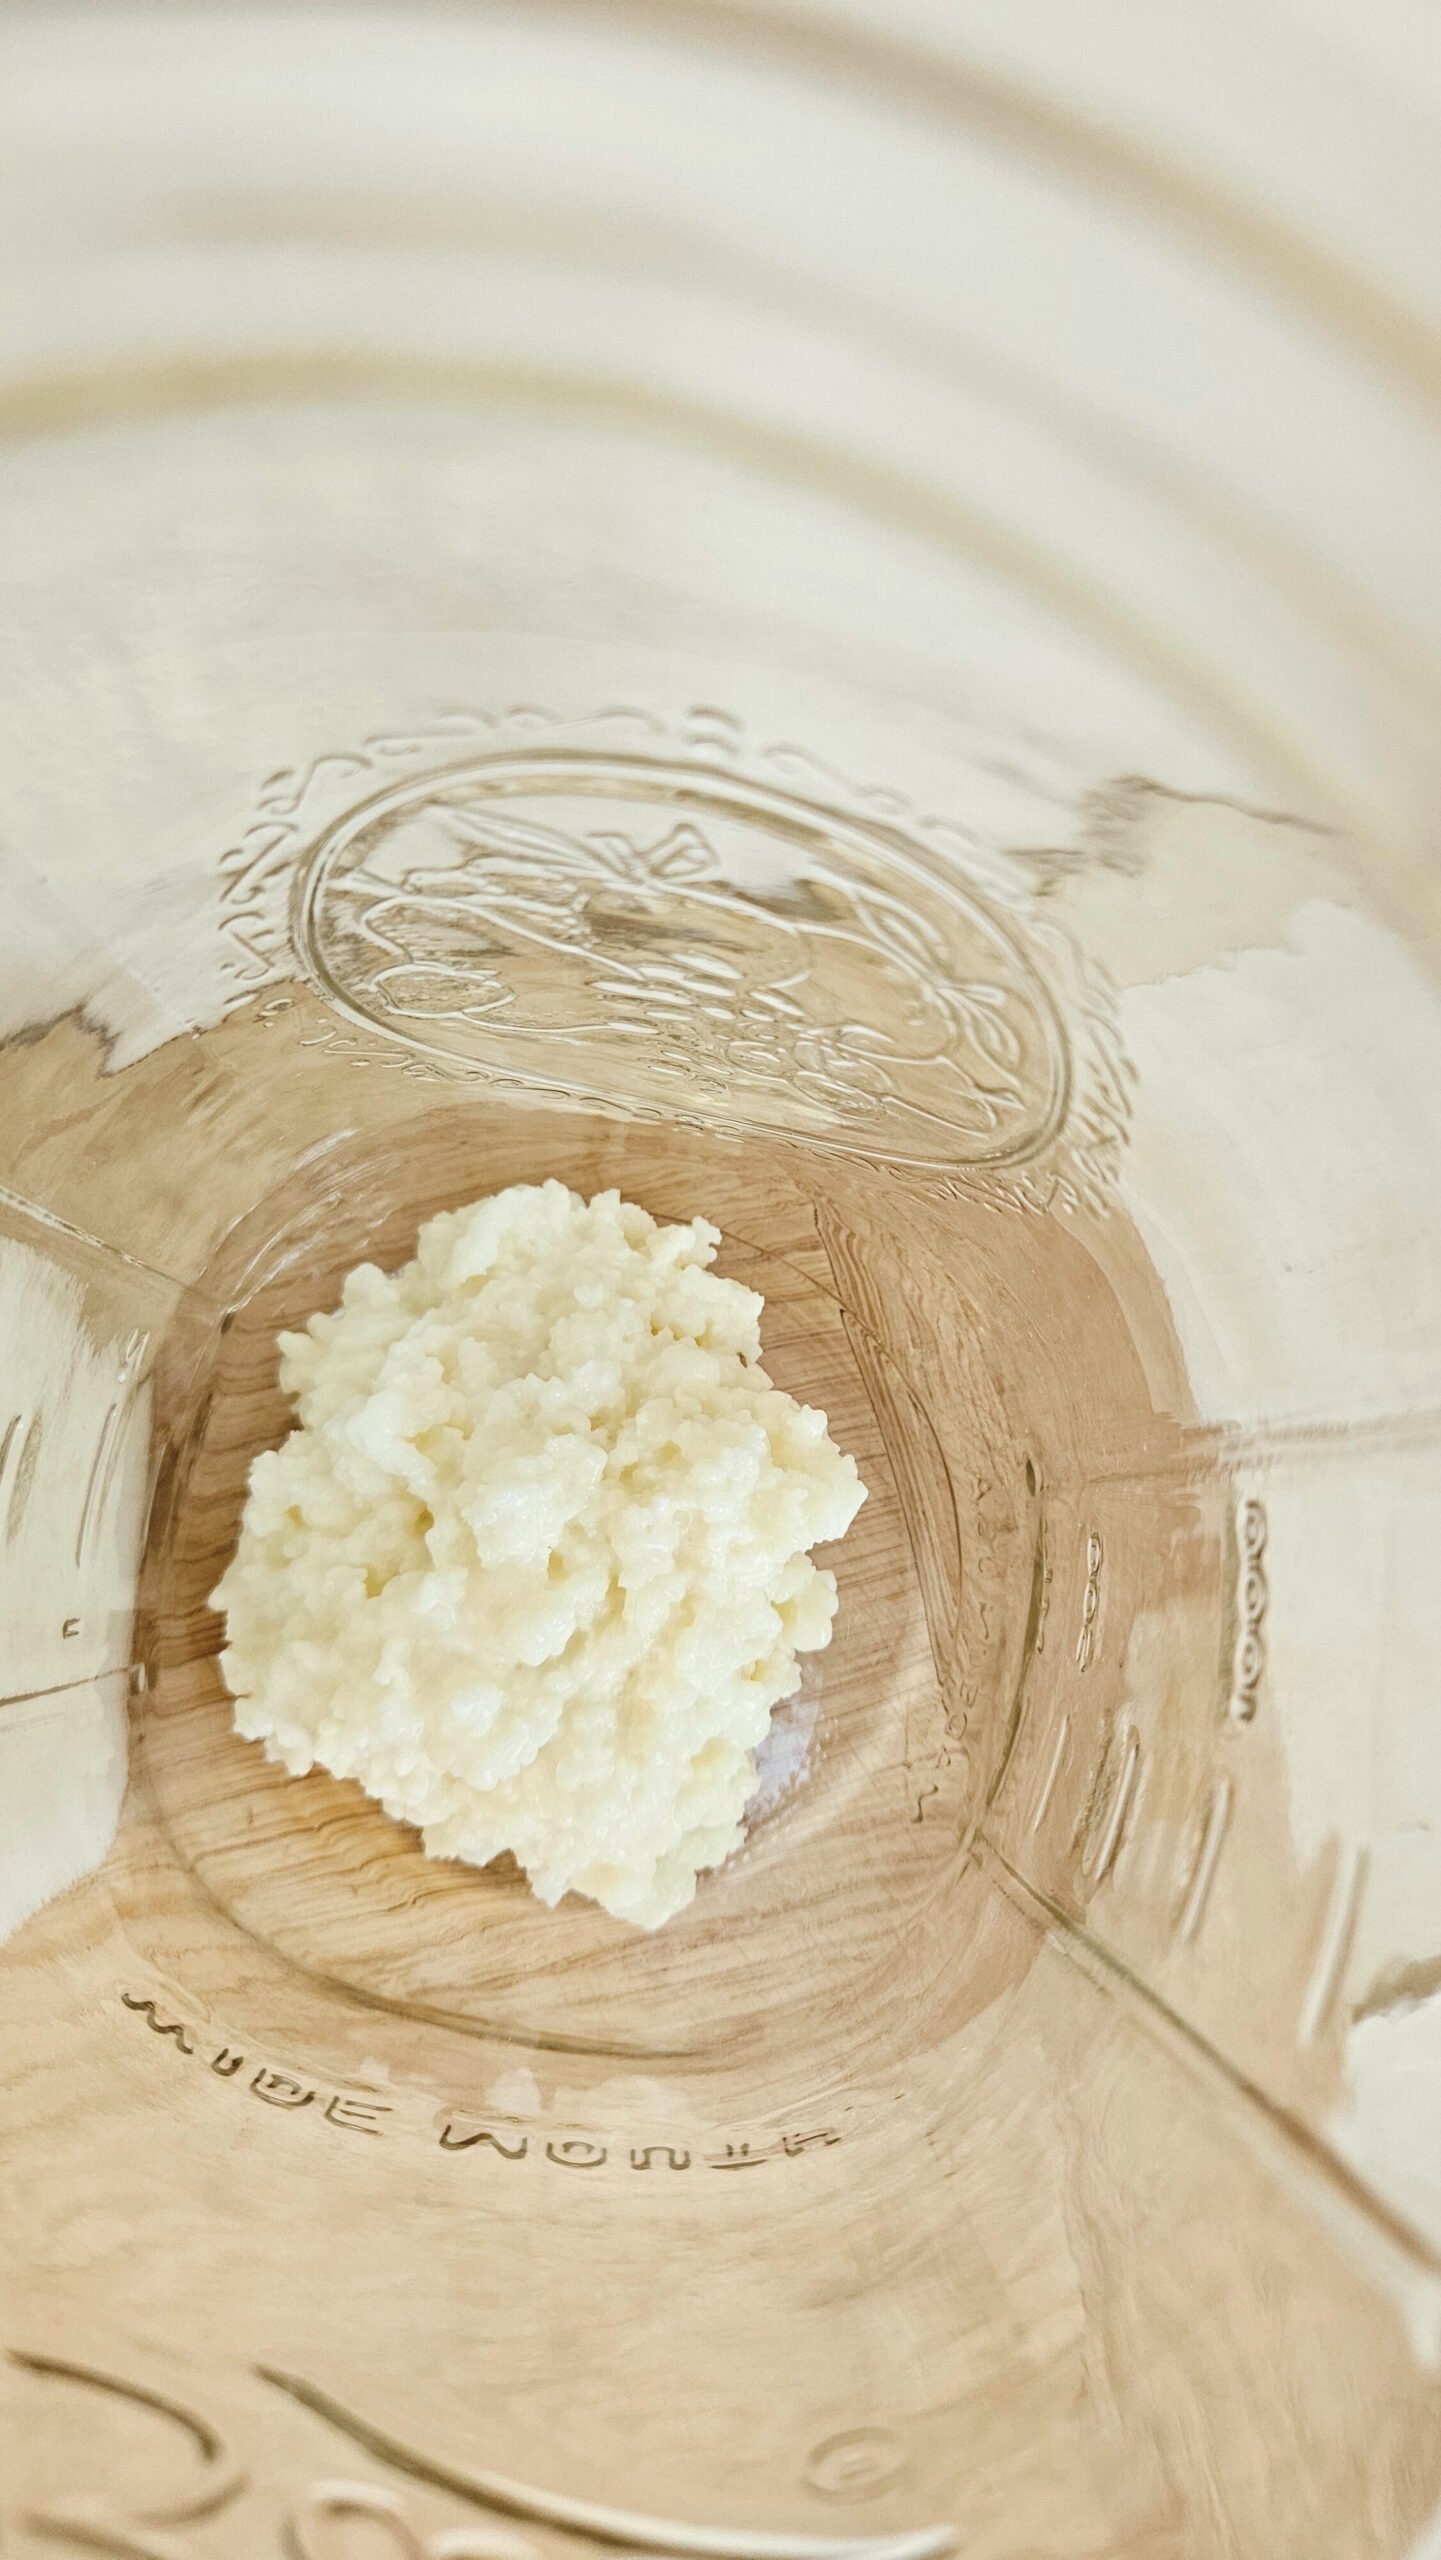
What are Milk Kefir Grains?

Milk kefir grains are gelatinous white or yellow colored “grains” that contain various bacteria and yeast strains on a complex polysaccharide (complex sugars) with a casein core. There are no actual grains such as wheat or barley present, the term is used to describe their appearance.
(source)
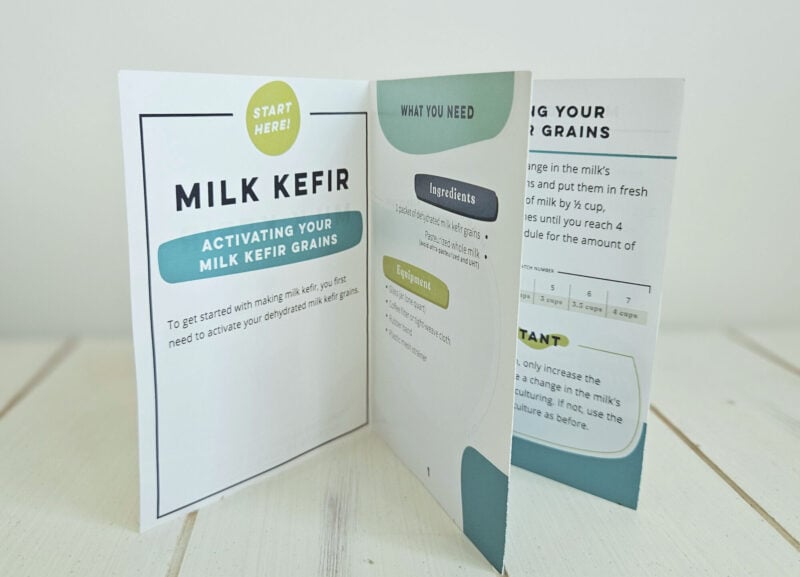
How to Get Started for Beginners
When I first began making raw milk kefir at home, I purchased dehydrated kefir grains from Cultures for Health. They are traditional, heirloom-style kefir grains with an industry-leading amount of lactobacillus kefiranofaciens. This is the first option, if you want the full experience from start to finish.
(Click here for option number two, which gets you started much quicker.)
Option #1: Dehydrated Kefir Grains
- 1 packet of dehydrated kefir grains
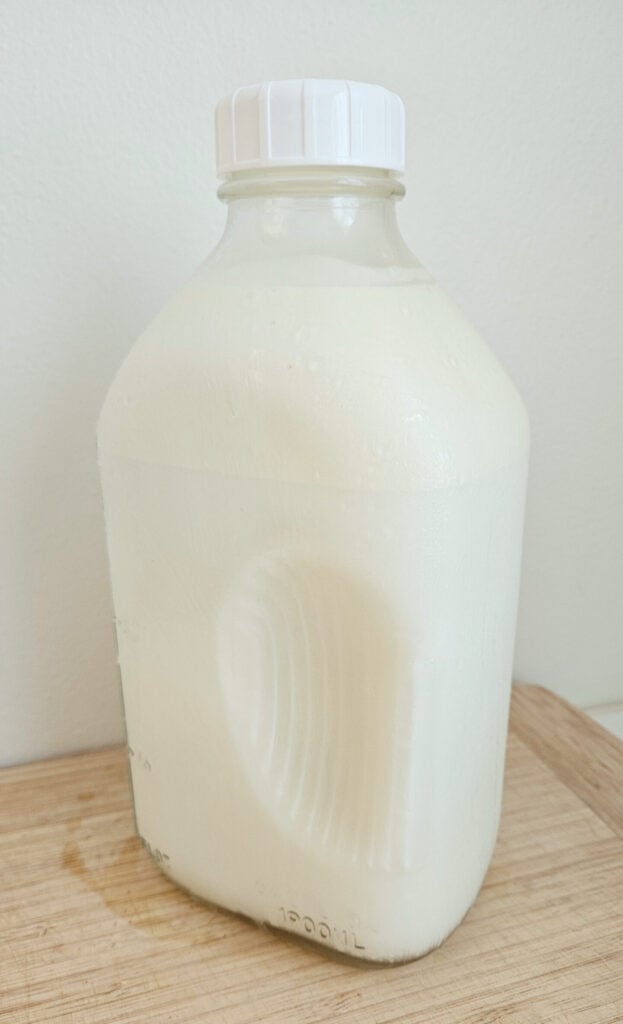
- pasteurized whole milk (Pasteurized milk is what Cultures for Health recommends. However, I used raw milk from the very beginning and had great success.)
- quart size mason jar
- coffee filter or cloth
- rubber band
- mesh strainer
- bowl
- spoon
- funnel
Steps to Activate
- Empty entire packet into quart size mason jar. Add 1 cup of milk and stir.
- Cover the jar with a coffee filter or cloth and secure with a rubber band. Allow to culture at room temperature.
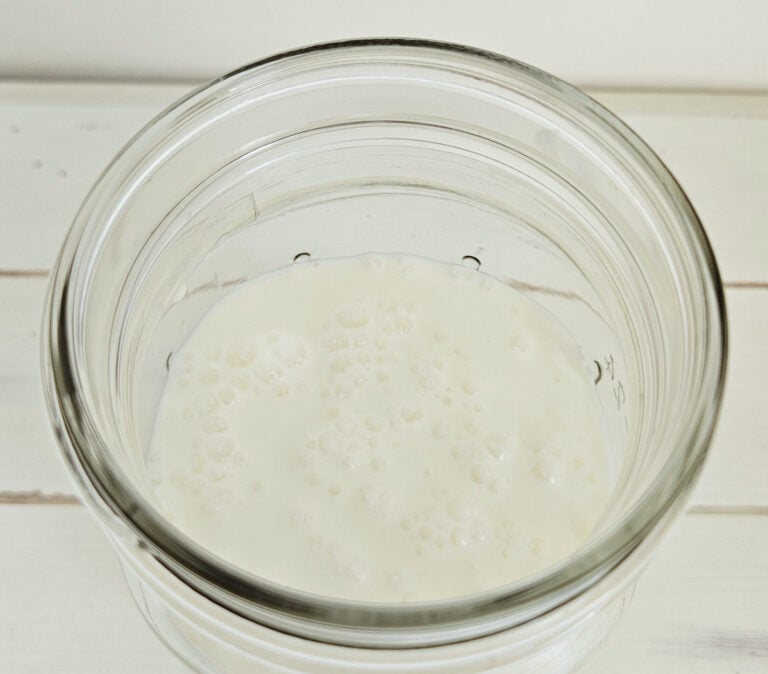
- Check after 12 hours, looking for signs of a thickened consistency, such as heavy cream or thicker. Keep checking until you notice this change, which should happen within 24 hours.
- Once thickened, strain out the grains and put them in new milk (1.5 cups this time instead of 1 cup).
- Continue culturing and straining for multiple batches, increasing the amount of new milk for each batch by 1/2 cup, until you are culturing at 4 cups.
- Batch #1: 1 cup of milk
- Batch #2: 1.5 cups of milk
- Batch #3: 2 cups of milk
- Batch #4: 2.5 cups of milk
- Batch #5: 3 cups of milk
- Batch #6: 3.5 cups of milk
- Batch #7: 4 cups of milk
- Once you reach 4 cups of milk, the grains are activated and ready to use!
TIP: The cultured milk made from each batch in the activation process won’t be the desired milk kefir, but it is totally safe to use if you desire to not waste it. When I went through this process, my preferred way to using each batch was as a substitute for regular milk in making mashed potatoes. It gave the mashed potatoes a slight tang, similar to using sour cream.
Option #2: Activated Milk Kefir Grains
Option number two to begin making milk kefir at home would be to purchase already activated milk kefir grains. This will save you time and eliminate using 17.5 cups (slightly over 1 gallon) of milk just for the purpose of activation.
If you decide to go this route, activated milk kefir grains can be purchased through my Etsy Shop.
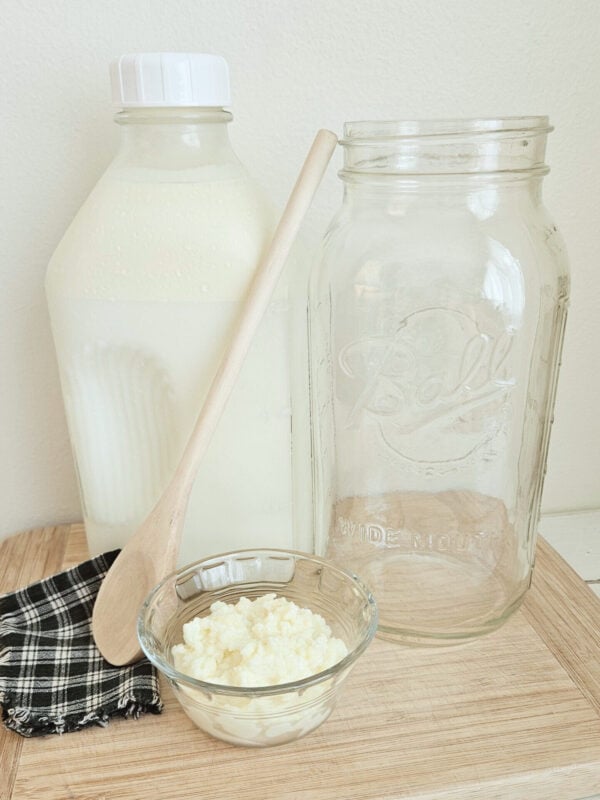
Ingredients
- 1 tablespoon of activated milk kefir grains
- 3 cups of fresh raw milk
Equipment
- quart size mason jar
- coffee filter or cloth
- rubber band
- mesh strainer
- bowl
- spoon
- funnel
Instructions
Tap/click the images for a description of each step ⬇️


- Strain kefir grains from the milk it arrived in (if you ordered from my Etsy Shop) and discard the milk.
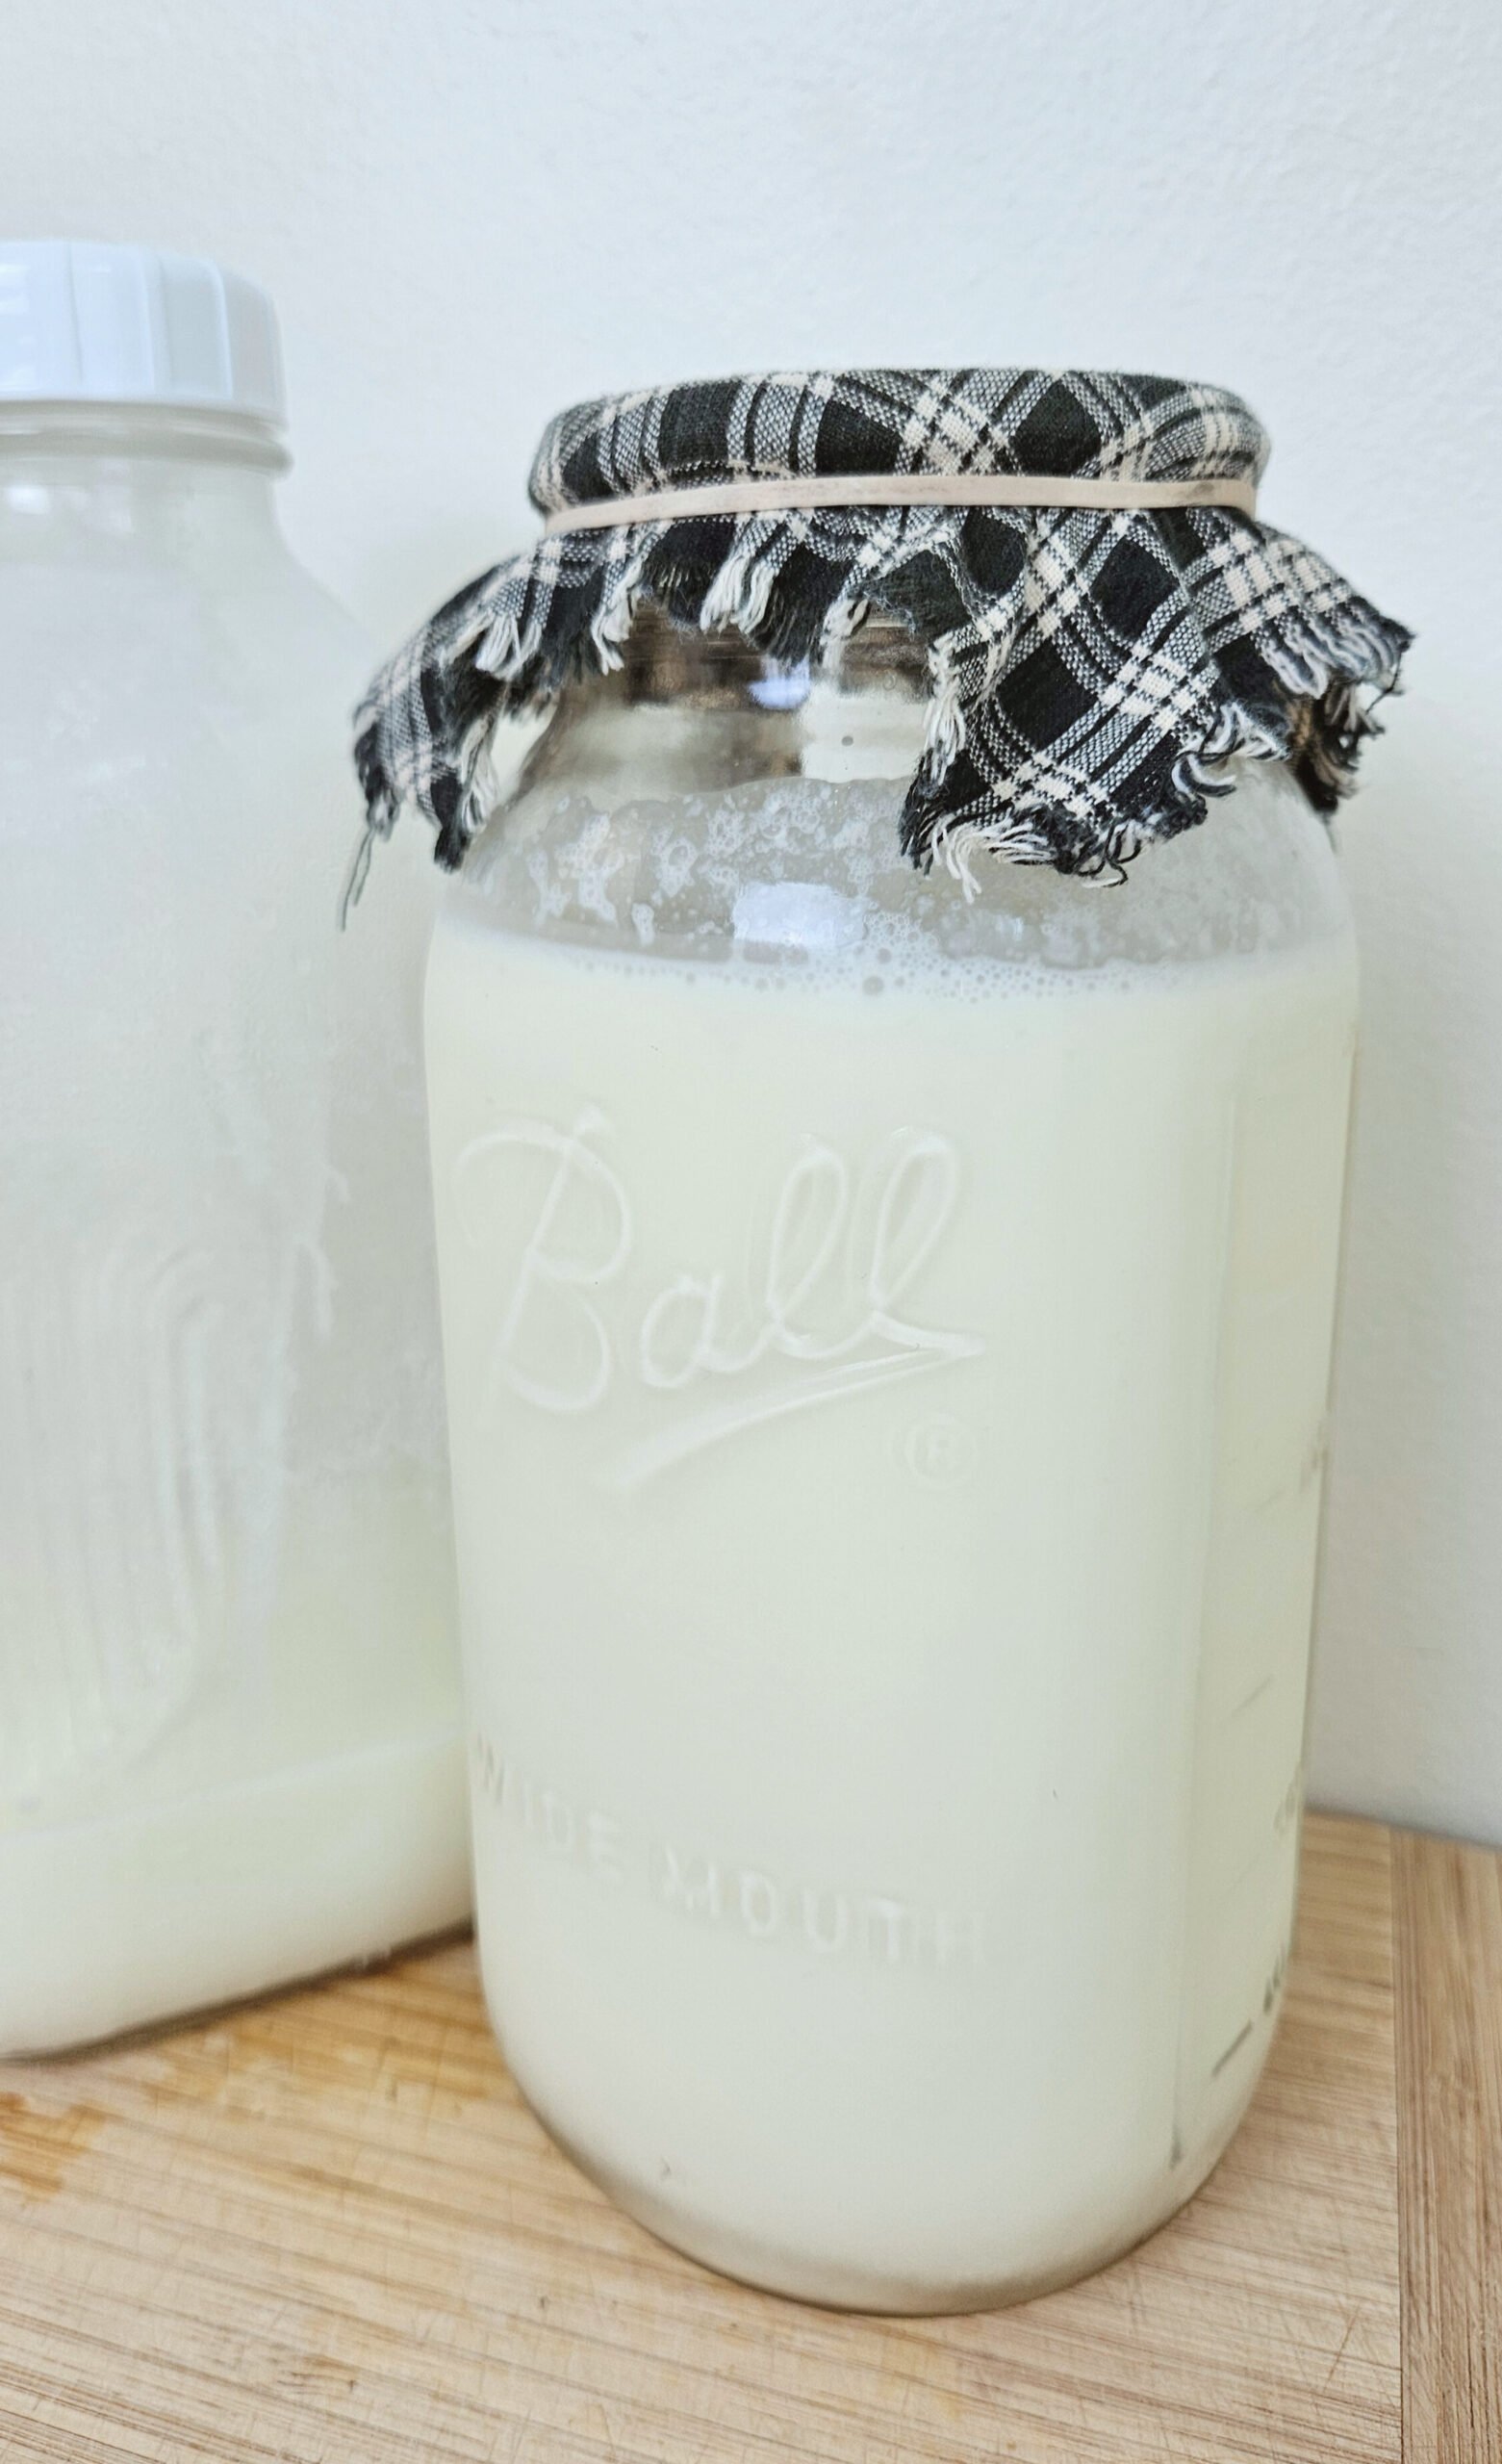
- Place kefir grains in a quart size mason jar and add the milk, leaving 2-3 inches of space from the top of the jar.
- Cover the jar opening with a coffee filter or cloth, and secure with a rubber band.
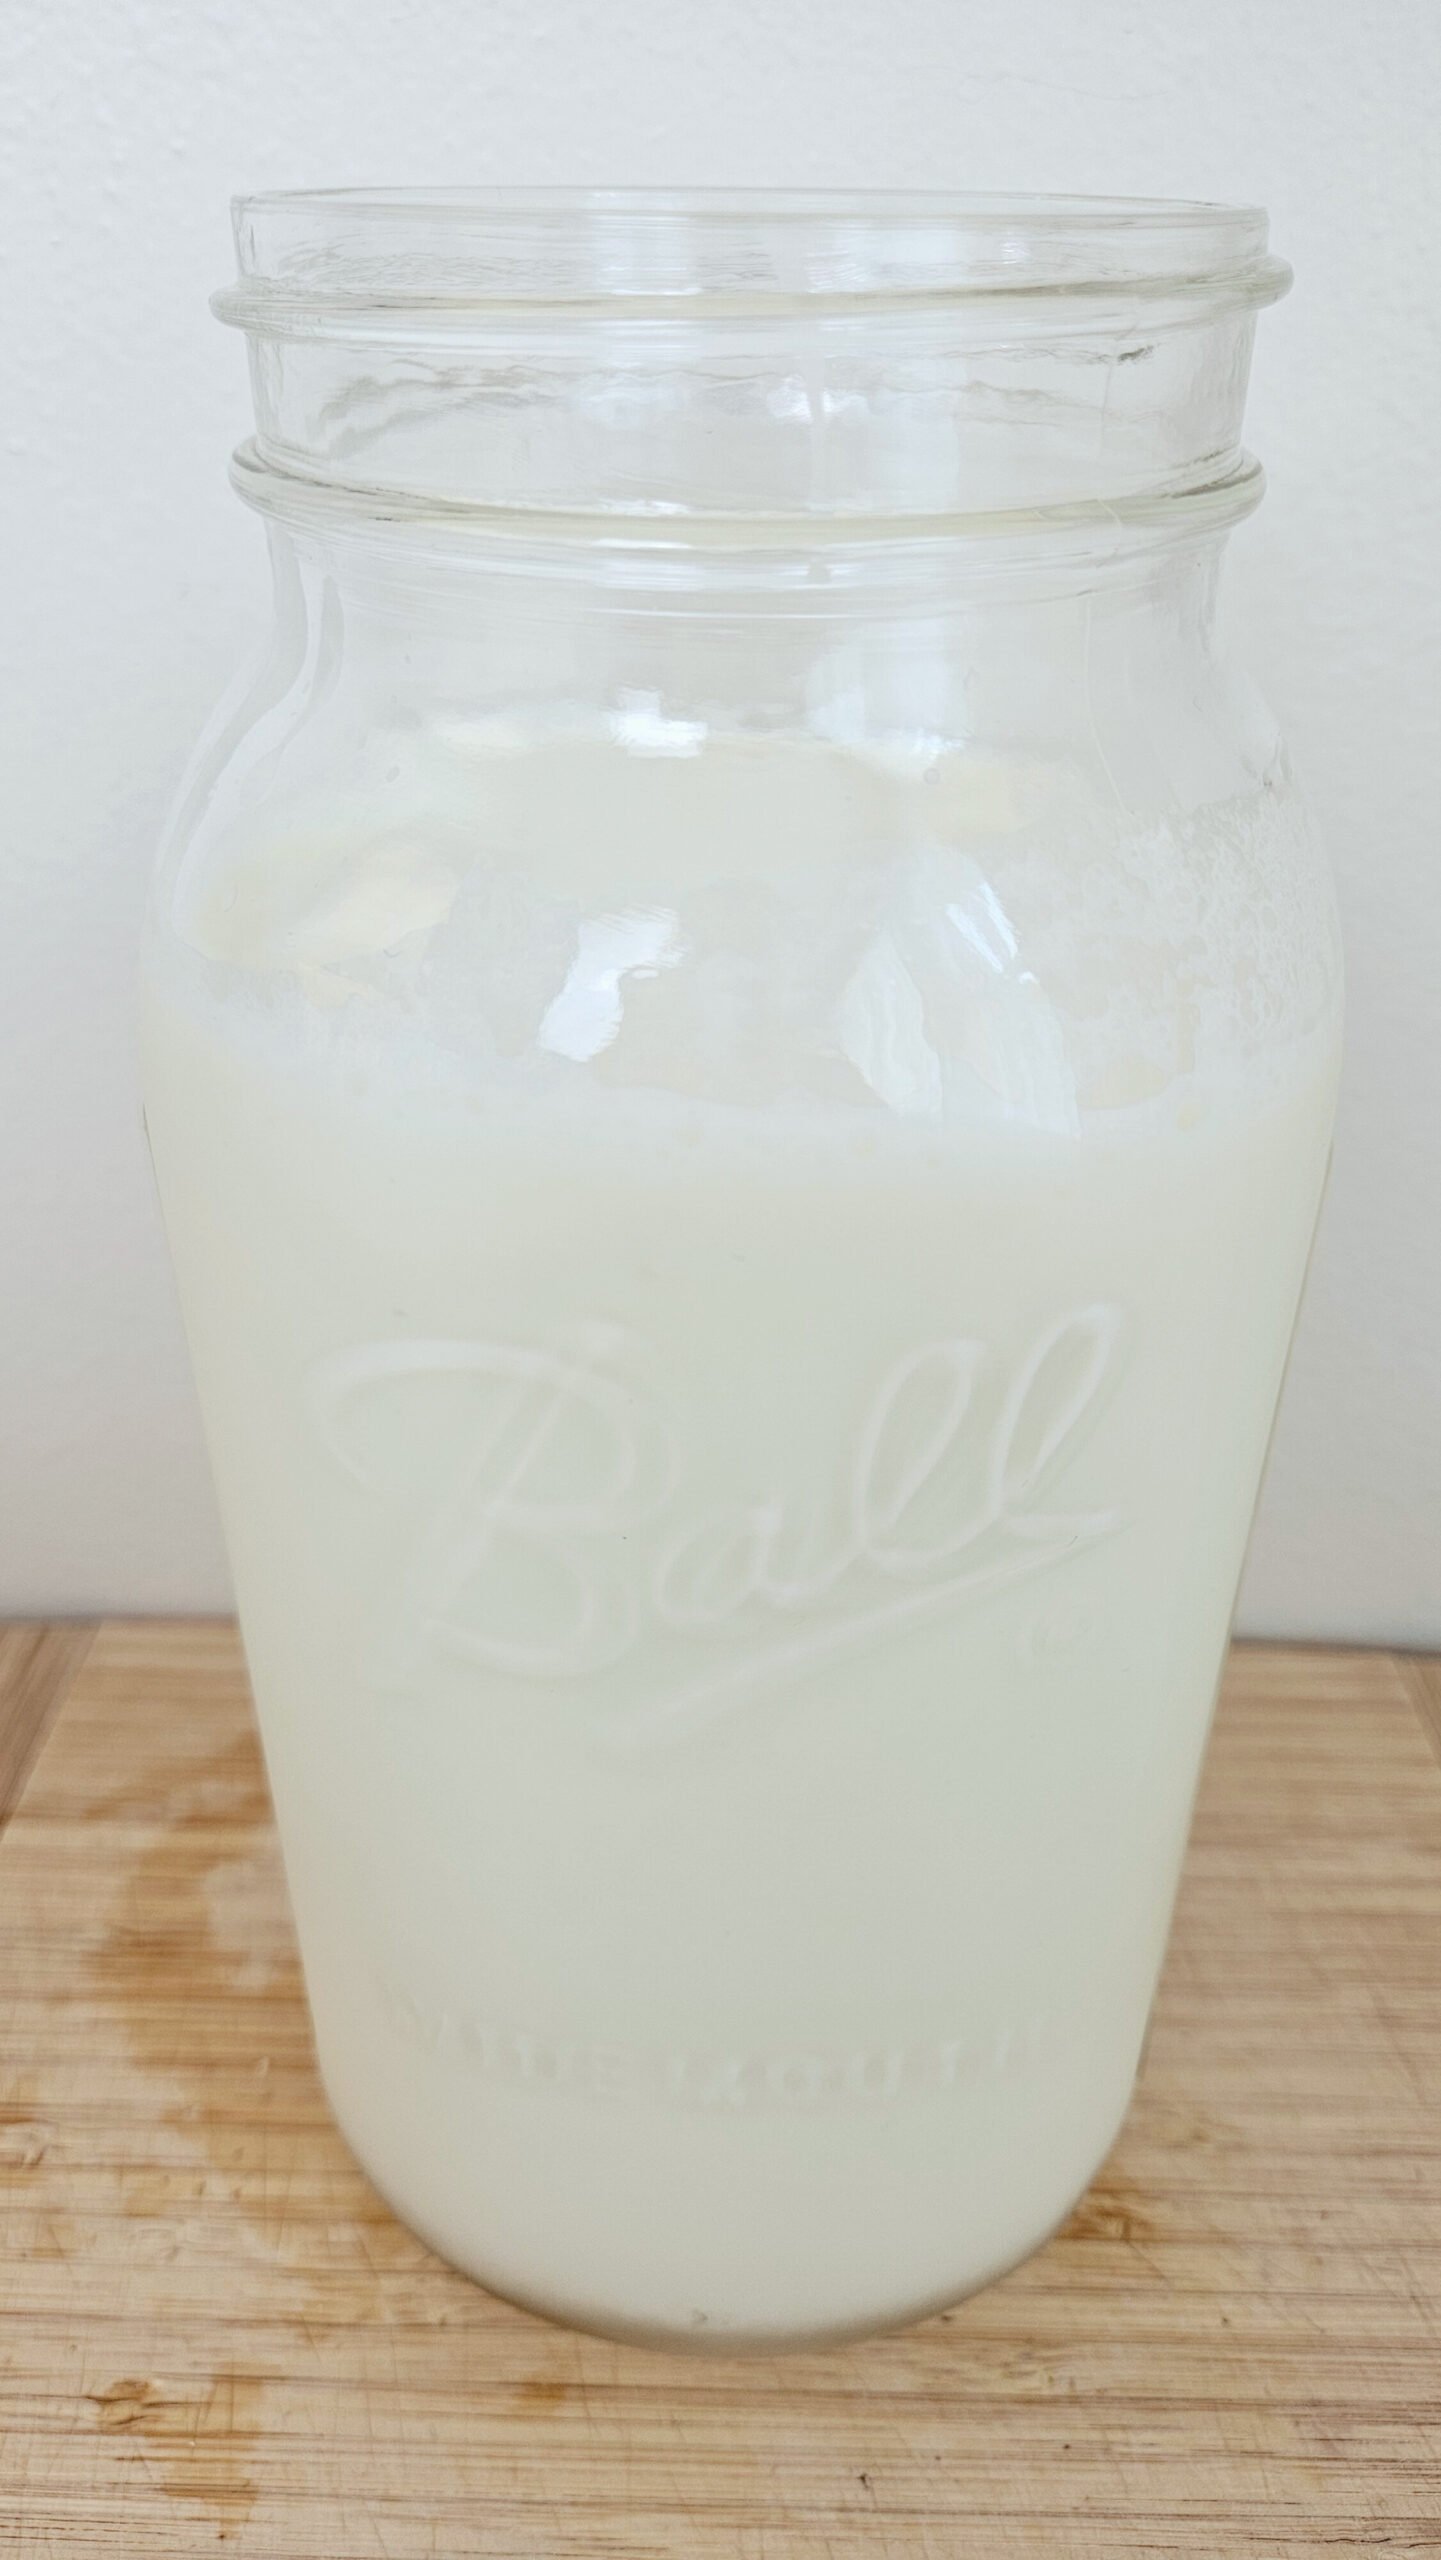
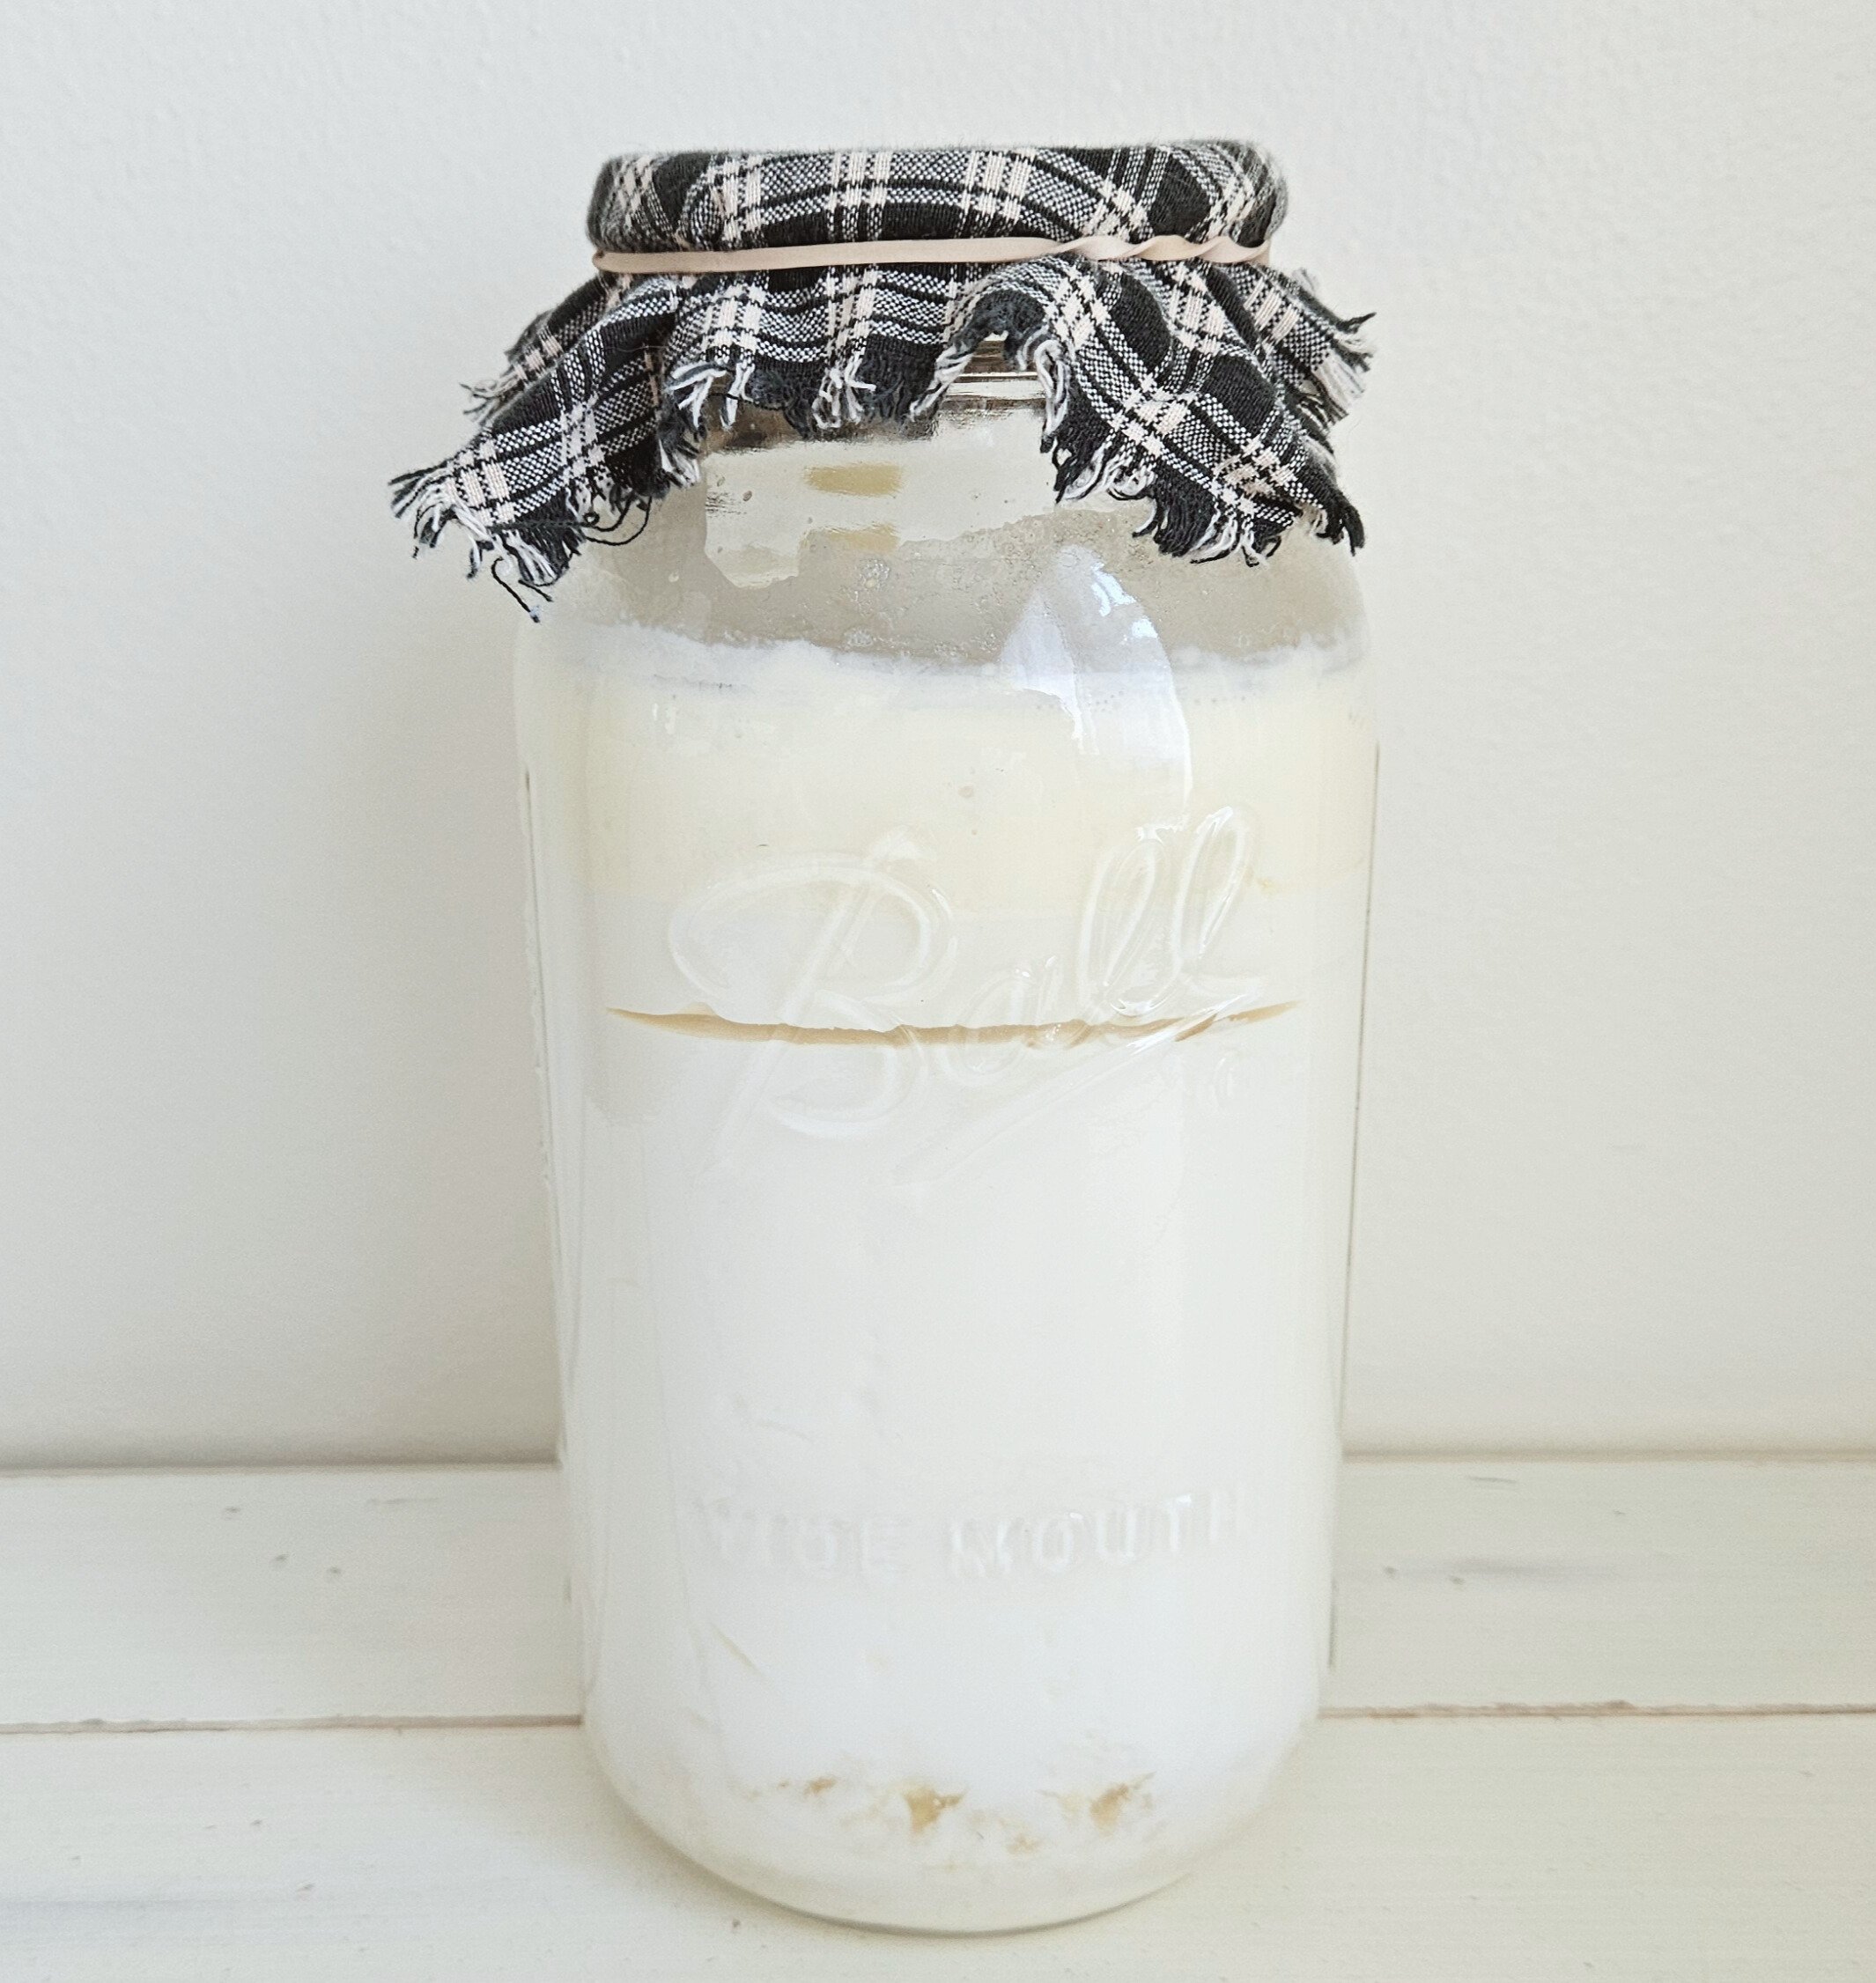
- Place on countertop and allow to culture for 12-48 hours.
- Check daily for signs of change. When the milk has thickened and developed a sweet and/or tangy taste, you have successfully made milk kefir!
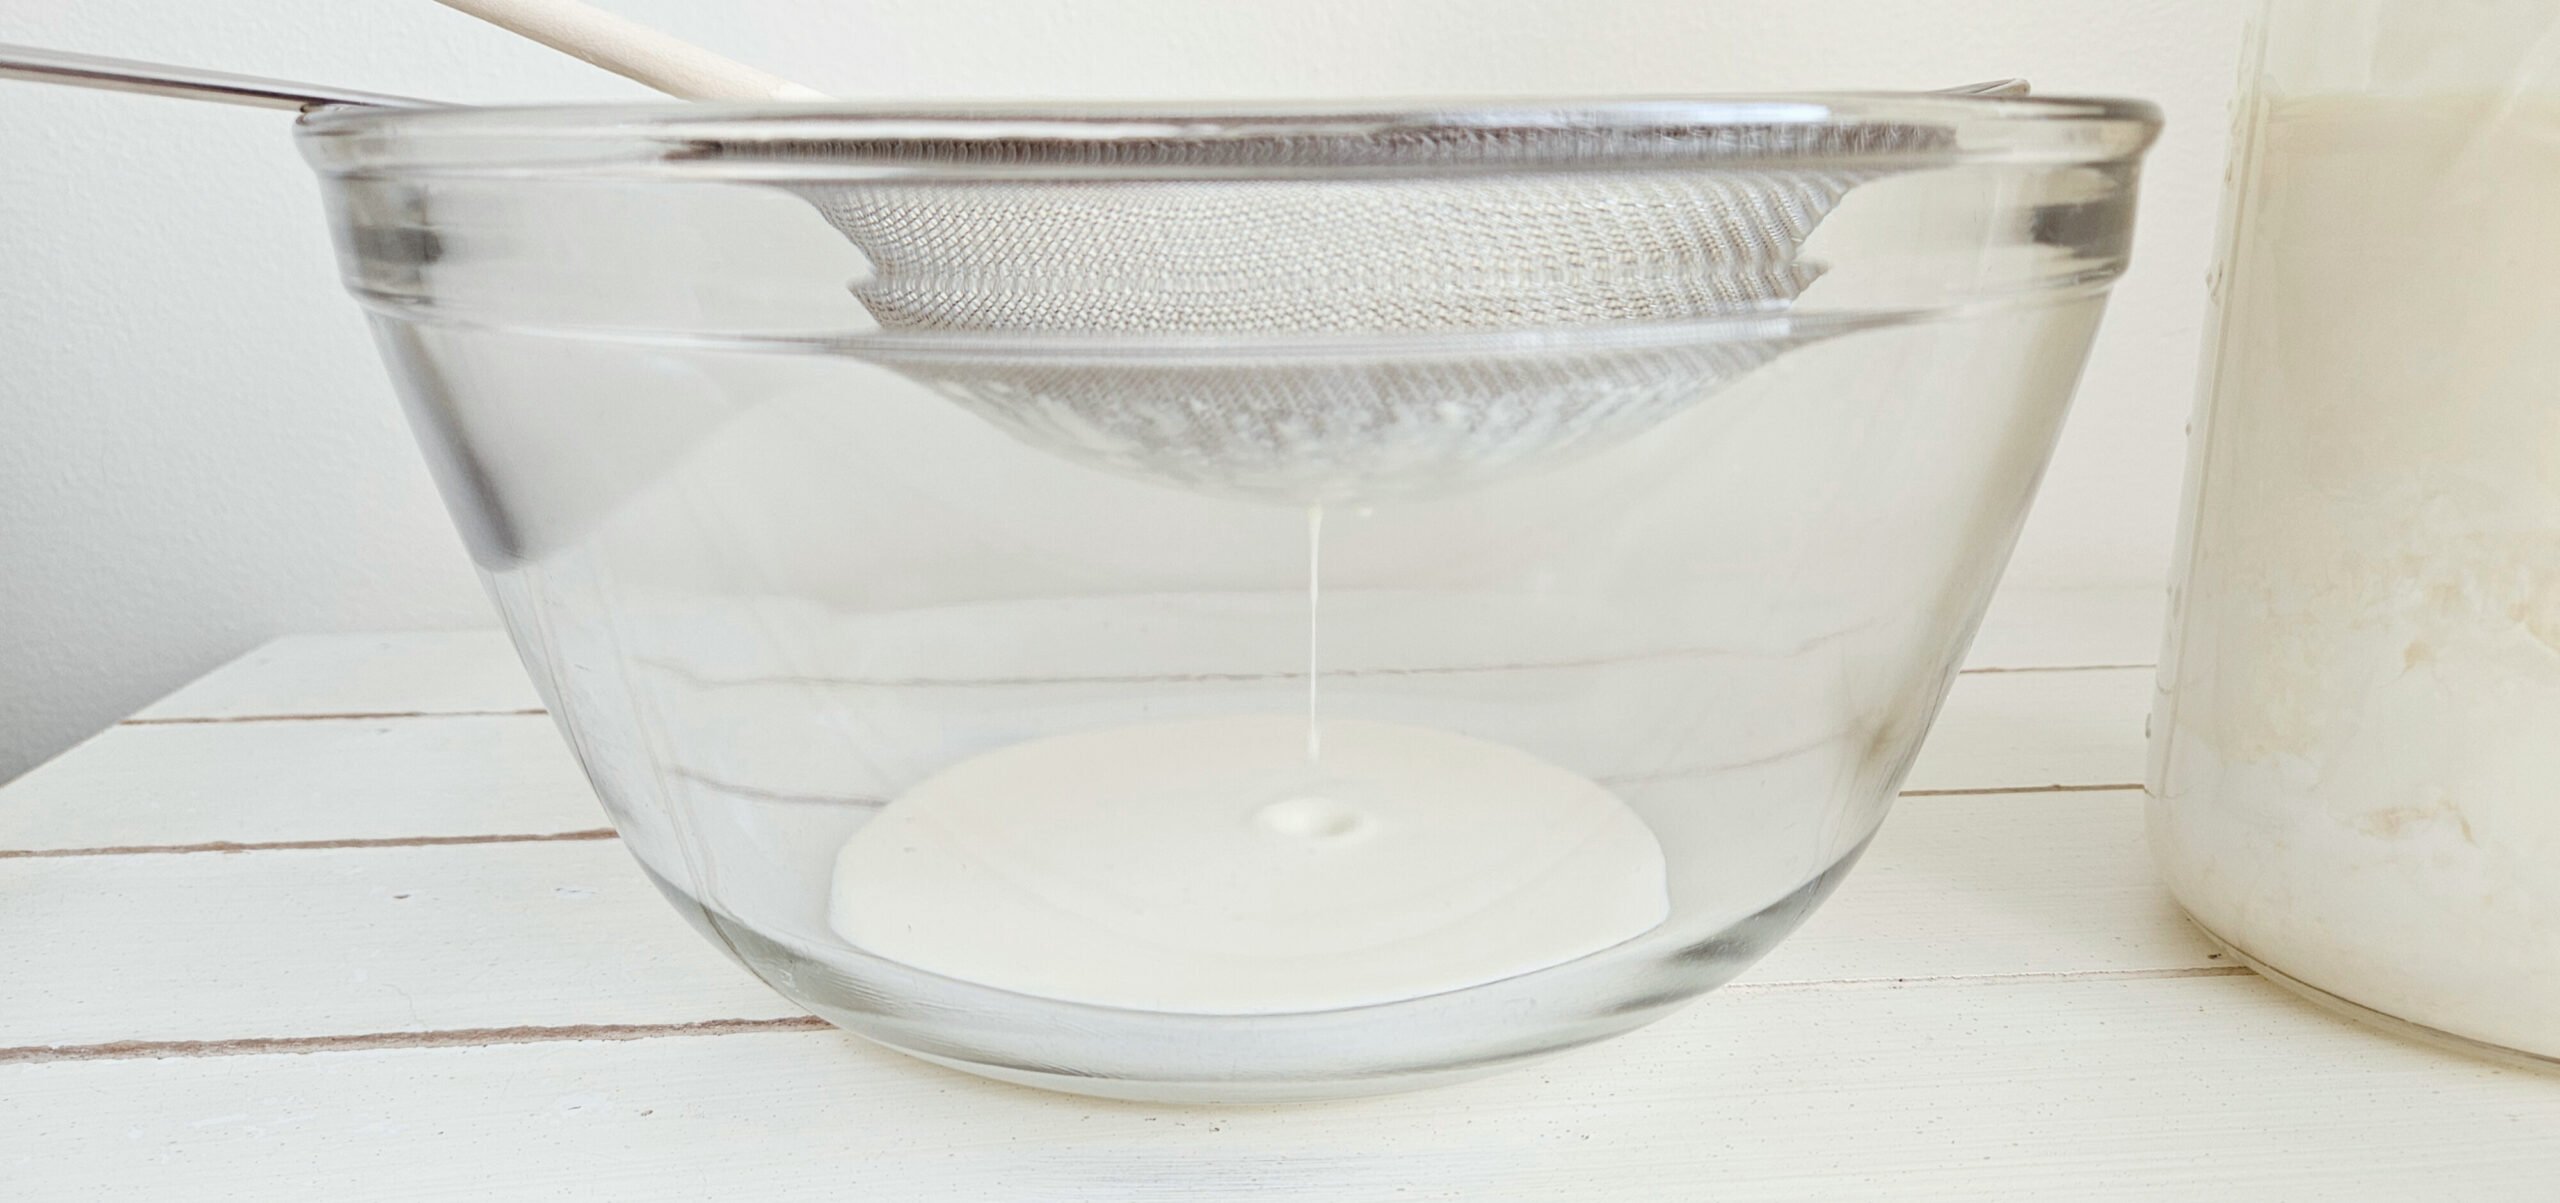
- Using a fine mesh strainer and spoon, strain the milk kefir into a bowl, separating out the grains from the final product.
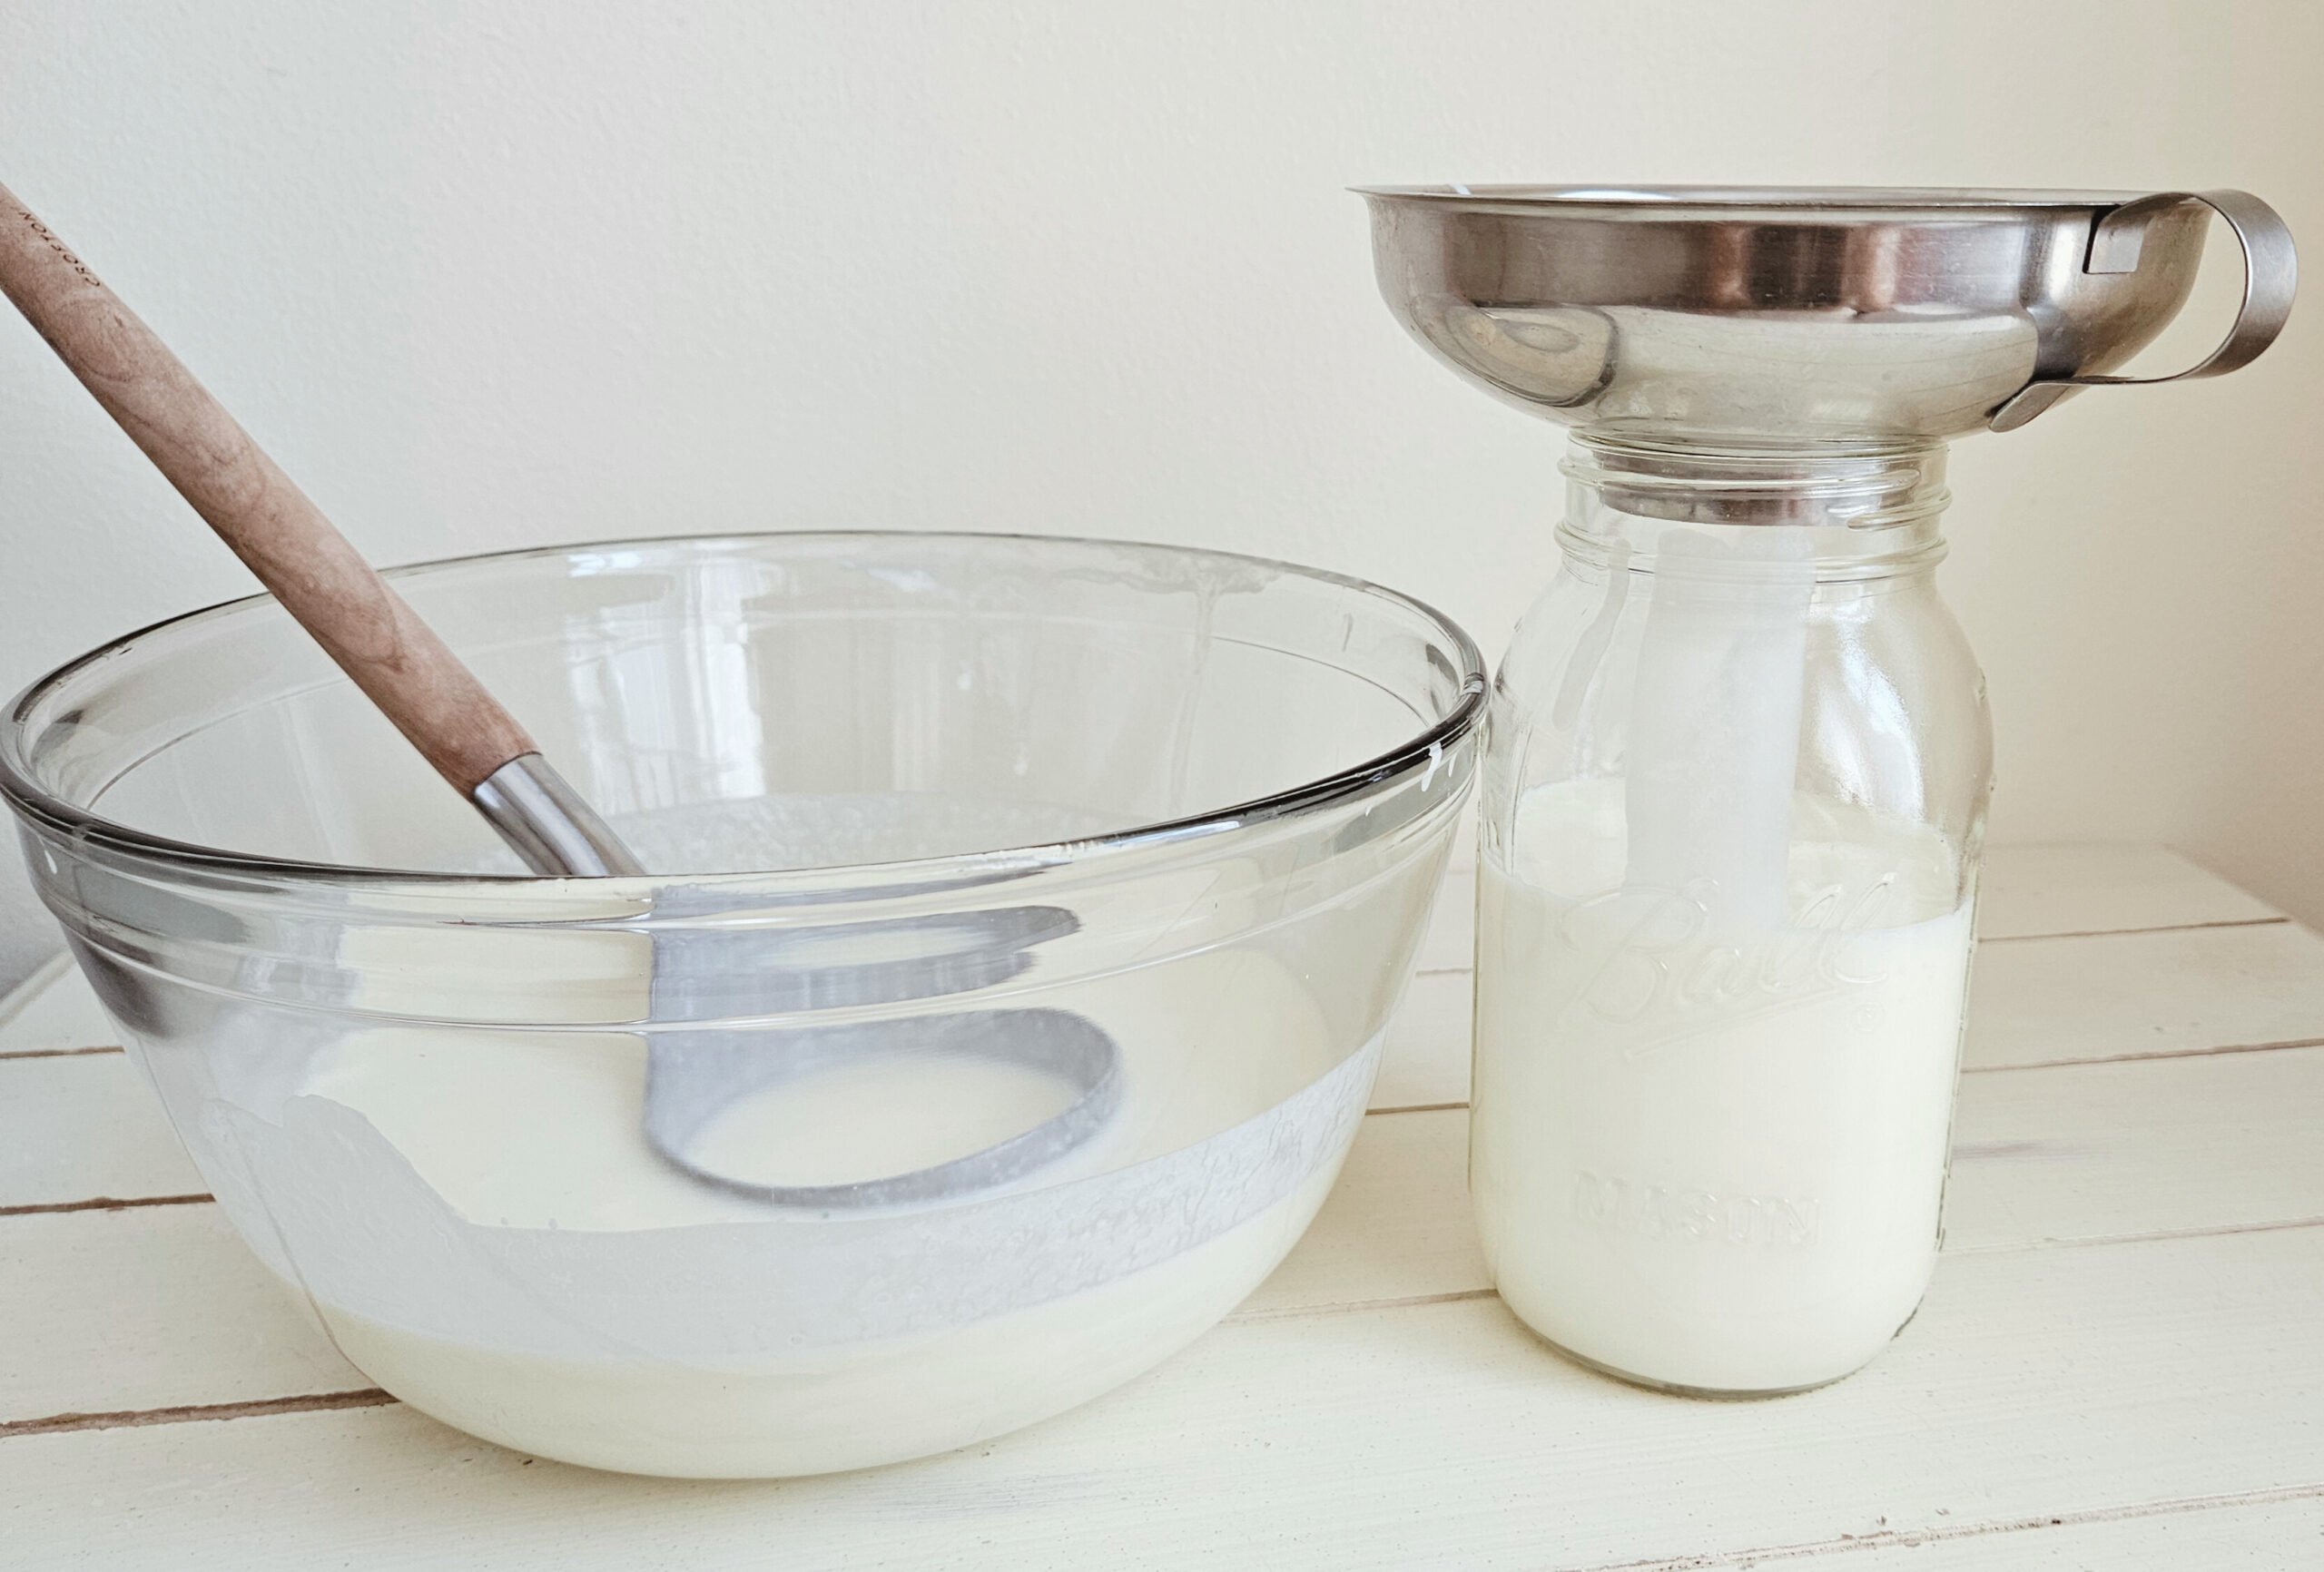
- Jar the final milk kefir and secure with a non-breathable lid. It is best consumed cold, so place in refrigerator until desired temperature is reached. Continue to store in refrigerator until consumed.
- Begin the process again with strained kefir grains.
Tips
- It is best to keep your fermenting milk kefir away from other cultures or ferments you may have going.
- Use these wide mouth mason jar lids for easy pouring!
- If you think you may have fermented it for too long (you see more separation than you intended), simply follow through on straining, pouring in a mason jar, and storing in the fridge. If it is too thick and/or too tangy for you to drink plain, simply use it for a homemade kefir smoothie or in making milk kefir cheese.
- I have never had milk kefir go bad when kept in the fridge. However, use reason and your senses before consuming anything you are suspicious of!
Ways to Enjoy
- Plain or flavored drink
- Smoothie or soup base
- Yogurt or buttermilk substitute in baked goods
- Homemade creamy salad dressings
- Homemade Cheese
favorite kefir drink
Even though I love a good kefir smoothie, most of the time I just drink it as a plain chilled drink.
Fool-Proof Milk Kefir Maintenance Routine
Milk kefir is extremely forgiving. One of the reasons it is one of my favorite ferments is because you simply can’t mess it up or kill it.
The time it takes to culture your milk will depend on your grains to milk ratio (more grains=quicker culturing time) and the temperature of the room. You’ll notice that in the summer you’ll make milk kefir quicker than you will in the winter.
The thickness, flavor, and amount of fizziness will be impacted by how long you let it culture. The longer you let it culture, the greater intensity of all three of those markers. So, if you accidentally leave it on the counter longer than intended, within reason, it will be perfectly suitable to consume.
If your milk kefir becomes over-fermented to the point where you don’t want to drink it, it is still valuable! You are in a perfect position to turn your over-fermented milk kefir into kefir cheese. See this post for more information:
The activated milk kefir grains can be used indefinitely if properly maintained, and will grow over time, producing an endless amount of grains. Therefore, you can repeat Steps 1-8 as listed above on repeat, or you can take breaks based upon your schedule or desired consumption rate.
TIP: When taking a break from making milk kefir, simply place your grains in fresh milk and store in the refrigerator until ready to begin again. You’ll want the grains fully covered by the milk. When ready to begin again, strain the grains from the milk and repeat Steps 1-8. As long as the grains are always “fed”, meaning never without milk, they will continue to live.
There truly isn’t an easier homemade probiotic-rich fool-proof drink around!
Grab Your Free Download ⬇️

Cost-Benefit Analysis

Full disclosure: I have never bought milk kefir at the store. I made it from scratch with my raw milk from the very beginning, and I have never had anything else. If you want to read my reasons why I don’t buy store-bought milk kefir, please see here:
With that being said, I thought it would still be valuable to conduct a cost-benefit analysis on making raw milk kefir at home vs. buying milk kefir at a grocery store.
As of January 2026 in Tennessee:
Homemade Raw Milk Keifr (Plain)
1 quart (32oz) raw milk
- 1 gallon = $10.00
- 1 gallon = 4 quarts
- 1 quart = $2.50
1 tbsp activated milk kefir grains
- Initial purchase from my Etsy Shop = $18.00
- Since this is an item that is reusable, I am not going to calculate the price for making just one batch, because 1 tbsp of milk kefir grains can make an endless number of batches of milk kefir. Similar to how I don’t factor in the cost of equipment when making a recipe.
Total: $2.50
- Yield: 1 quart (32oz)
Lifeway Kefir (Plain & Unsweetened)(find here)*
- $4.19 for 32oz
Total: $4.19
*Ingredients: Pasteurized Lowfat Milk, Nonfat Milk, Pectin, Vitamin A Palmitate, Vitamin D3, Cultures.
As you can see, Lifeway Kefir bought at the store is more than 1.5x the price than my homemade milk kefir. Additionally, the ingredients are far inferior for the store-bought kefir vs. my homemade milk keifr made with raw milk.
For more nutritional information and health benefits of raw milk, please see here:
Based upon my analysis, I will keep making my own raw milk kefir at home 👍👍.
FAQs
Related Posts
Comment below if you’ve found a creative way to incorporate the probiotic benefits of milk kefir into your daily diet 👇.

Raw Milk Kefir
Equipment
- 1 quart size mason jar (32oz)
- 1 coffee filter or cloth
- 1 rubber band
- 1 mesh strainer
- 1 bowl (medium-sized)
- 1 spoon
- 1 funnel
Ingredients
- 1 tbsp activated milk kefir grains
- 3 cups fresh raw milk
Instructions
- Strain kefir grains from the milk it arrived in (if you ordered from my Etsy Shop) and discard the milk.
- Place kefir grains in a quart size mason jar and add the milk, leaving 2-3 inches of space from the top of the jar.
- Cover the jar opening with a coffee filter or cloth, and secure with a rubber band.
- Place on countertop and allow to culture for 12-48 hours. It is best to keep it away from other cultures or ferments you may have going.
- Check daily for signs of change. When the milk has thickened and developed a sweet and/or tangy taste, you have successfully made milk kefir!
- Using a fine mesh strainer and spoon, strain the milk kefir into a bowl, separating out the grains from the final product.
- Jar the final milk kefir and secure with a non-breathable lid. It is best consumed cold, so place in refrigerator until desired temperature is reached. Continue to store in refrigerator until consumed.
- Begin the process again with strained kefir grains.
Notes
- I prefer raw cow’s milk, but milk kefir grains can culture other types of animal and plant-based milk. I have never tried the recipe with store-bought milk.
- The time it takes to culture your milk will depend on your grains-to-milk ratio (more grains=quicker culturing time) and the temperature of the room.
- The thickness, flavor, and amount of fizziness will be impacted by how long you let it culture. The longer you let it culture, the greater intensity of all three of those markers.
- The activated milk kefir grains can be used indefinitely if properly maintained, and will grow over time, producing an endless amount of grains.
- When taking a break from making milk kefir, simply place your grains in fresh milk and store in the refrigerator until ready to begin again. You’ll want the grains fully covered by the milk. When ready to begin again, strain the grains from the milk and repeat Steps 1-8. As long as the grains are always “fed”, meaning never without milk, they will continue to live.
- The amount of grains and milk pictured are a greater quantity than the recipe, because I frequently make large batches at home. The recipe quantities are good for starting out. As your grains grow, you can increase the amount of milk you culture.
This is a personal blog. All posts, recipes, recommendations, and how-tos are for informational use and personal viewing pleasure only. Blog posts are not written by AI.


subscribe